Thursday, April 22, 2010

Spend and Save at the Produce Stand THIS FRIDAY 11 am - 3 pm!

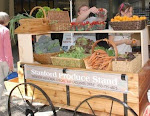
Join us this Friday from 11 am to 3 pm for the Stanford Produce Stand! Come get your weekly supply of delicious, fresh, organic, and locally grown items. We are located in the front courtyard of Tresidder Memorial Union.

Instant Produce Stand Savings This Week!

Starting this week, spend $5 at the Produce Stand, and get an instant 5% off your purchase! Additionally, spend $10 or more and receive a 10% off coupon redeemable next Friday! Remember: If you received a 10% off coupon last week, be sure to stop by this week to redeem it!

This Week at the Produce Stand

From the Stanford Community Farm and gardens: Leeks, bok choy, Chinese cabbage, rainbow chard, beets, green garlic, green onions, kale, turnips, and collards

From ALBA Organics: Avocados, strawberries, oranges, artichokes (for tips on how to cook and eat an artichoke, check out this website!), and salad mix

Spotlight on: Avocados!


Many have asked, and this week, we deliver. Avocados will be making their Spring Quarter debut at the Produce Stand this week! Who can resist avocados? They are rich, creamy, and just when you thought they couldn't possibly get better, it turns out they're GOOD for you! Contrary to popular belief, fats in the diet are essential for life. The key is getting the right kind of fat. Conveniently, avocados are a great source of the right kind. They're very high in monounsaturated fats, which have been shown to reduce heart disease by decreasing levels of LDL cholesterol (the bad stuff!) and increasing levels of HDL cholesterol (the good stuff!)

So what are you waiting for? Eat to good health with this recipe, adapted from Simply Recipes, for the "Perfect Guacamole."

Ingredients

2 ripe avocados
1/2 red onion (can substitute white onion instead)
1-2 serrano chiles, stems and seeds removed, minced (can substitute jalapeno peppers instead)
2 tablespoons cilantro leaves, finely chopped
1 tablespoon fresh lemon juice
1/2 teaspoon coarse salt
dash of freshly grated black pepper
1/2 ripe tomato, seeds and pulp removed, chopped

1. Cut avocados in half and remove seed. Scoop out avocado from the peel, put in a mixing bowl. (For tips on how to cut and peel an avocado, visit this link.)

2. Mash the avocado. (The mashing instrument of choice is up to you. Popular methods include: a fork, a potato masher, the back of a spoon, or even your hands.) Add the chopped onion, cilantro, lemon juice, salt, and pepper. Add the chili peppers/jalapenos gradually, and adjust according to your preference. (And be sure to exercise caution when handling peppers - keep those hands away from your eyes!) Keep the tomatoes separate until ready to serve.

3. Cover with plastic wrap and refrigerate until ready to serve. Mix in the chopped tomatoes just before serving.

Remember, feel free to experiment to find the taste profile that hits the right note for you. Some people prefer chunkier guacamole, while others like their avocado mashed up more. Some prefer more salt, others more spice. I prefer to add chopped up garlic and cheese as well. There is no one way to do it right, so taste and adjust as you go (or just keep tasting...).

To sum it all up: An instant 5% off when you spend $5 or more on a delicious selection of fresh, organic produce (not to mention those heart-healthy essential fatty acids)! What reason do you have not to stop by?

See you at the Produce Stand!

Photo credit: http://petitfoodie.wordpress.com

Wednesday, April 14, 2010

Produce Stand THIS FRIDAY 11 am - 3 pm!

Join us this Friday from 11 am to 3 pm for the Stanford Produce Stand! Come get your weekly supply of delicious, fresh, organic, and locally grown items. We are located in the front courtyard of Tresidder Memorial Union.

Special Produce Stand Promotion Continues This Week!

Remember, if you received a 10% off coupon last week, now is your chance to redeem it! Don't forget to bring a friend to save even more! If you did not receive a coupon last week, worry not, the promotion will be continuing for one more week. Spend $10 or more at the Produce Stand this Friday and receive a 10% off coupon redeemable next Friday!

This Week at the Produce Stand

From the Stanford Community Farm and gardens: Leeks, sugar snap peas, kale, rainbow chard, beets, carrots, and collards

From ALBA Organics: Strawberries, oranges, artichokes (for tips on how to cook and eat an artichoke, check out this website!), and salad mix

Spotlight on: Leeks!


Leeks are the often overlooked member of the Alliaceae family, which includes the more familiar onion and garlic. Leeks are a somewhat milder and sweeter version of an onion. Unlike the tight bulb onions form, leeks produce a long cylinder of bundled leaf sheaths. So which part of the leek do you eat? Typically, the white onion base and the light green part of the stalk. The farther you move up the stalk, the tougher and less edible it becomes.

Leeks are often used to flavor homemade stock and can be incorporated into a variety of recipes including (but certainly not limited to): Vichyssoise (a pureed potato leek soup), caramelized and served alongside any main entree (hint: porkchops!), added to pasta, thinly sliced and added to salad (raw), or sauteed along with any vegetable combination you fancy. But for today, we are honing in on one leek dish in particular: Caramelized Leek Risotto.

Ingredients:

2 tablespoons butter or olive oil
1 large leek
salt and pepper
3/4 cup arborio rice
3/4 cup dry white wine
~ 3-4 cups chicken or vegetable stock
1/2 cup grated Romano or Parmeson

1. Cut off the dark green part of the leek. Cut the remaining white base and light green part of the stalk in half lengthwise and then into 1/3" half moons.
2. Melt butter (or add olive oil) in pot over medium heat. Add leeks to pot and stir to coat.
3. Cook leeks, stirring occasionally, until they start to brown (about 25 minutes) (be sure not to let them burn!)
4. Season leeks with salt and pepper.
5. Now add the rice! Stir to coat the rice in the butter-y, leek-y goodness, about 2 minutes.
6. Add wine; allow the alcohol to evaporate.
7. Gradually add the stock in large ladle-fuls, adding more broth after the previous addition has been absorbed. Stir continuously during this process and keep the mixture at a light simmer.
8. Continue adding stock until the rice is tender and slightly al dente (start tasting the rice at about the 12 minute mark).
9. Once it's done, take it off the heat and stir in the cheese.
10. Enjoy!

*Note that while this risotto features caramelized leeks (yum!), you can, of course, add anything else you'd like. You can incorporate additional ingredients during the broth-ladling process.

Fun leek facts:
-The leek is one of the national emblems of Wales. It appears on the cap badge on the Welsh Guards (pictured below). (According to Wikipedia: "The leek arises from an occasion when a troop of Welsh were able to distinguish each other from a troop of English enemy dressed in similar fashion by wearing leeks.")
-People celebrate St. David's Day (the national day of the Welsh), by wearing a leek symbol.


See you at the Produce Stand!

photo credit: http://grubchico.org/

Thursday, April 8, 2010

Produce Stand THIS FRIDAY + Special 10% discount for spending $10 or more!

Join us this Friday from 11 am to 3 pm for the Stanford Produce Stand! Come get your weekly supply of delicious, fresh, organic, and locally grown items. We are located in the front courtyard of Tresidder Memorial Union.

Special Produce Stand Promotion This Week!!!

Spend $10 or more at the Produce Stand tomorrow and receive a 10% off coupon redeemable next Friday! But wait, there's more! Return next Friday and bring a friend who also spends $10 or more, and we'll upgrade your coupon to 15% off!

This Week at the Produce Stand

From the Stanford Community Farm and gardens (pictured below): Sugar snap peas, kale, rainbow chard, beets, leeks, carrots, and collards


From ALBA Organics (pictured below): Strawberries, tangerines, artichokes (for tips on how to cook and eat an artichoke, check out this website!), and salad mix


By shopping at the Stanford Produce Stand, you are putting your food dollars toward a system that is better for your health, the health of the environment, and the health and livelihood of the people who grow your food - all while supporting the Stanford community and the vision of sustainability we are hoping to achieve. Why expend the extra effort driving to the supermarket? Delicious, nutritious, locally grown, organic produce is available right in the center of campus. So spread the word, take a stroll to the Stand, and stock up on fresh produce for this beautiful Spring weekend!

See you at the Produce Stand!

Thursday, April 1, 2010

Produce Stand Returns THIS FRIDAY 11 am to 3 pm!

The Produce Stand is back in action for Spring Quarter!

Join us this Friday from 11 am to 3 pm for the Stanford Produce Stand! Come get your weekly supply of delicious, fresh, organic, and locally grown items. We are located in the front courtyard of Tresidder Memorial Union.


From the Stanford Community Farm and gardens: Sugar snap peas, kale, chard, beets, and carrots

From ALBA Organics: Strawberries, tangerines, and salad mix

Spotlight on: Sugar Snap Peas


Sugar snap peas: nature's candy. Snap peas are crunchy, sweet, and terribly addicting. They're delicious and satisfying when eaten raw, and are often enjoyed as a snack in their unadulterated state (the whole pod is edible!). The great thing about foods like sugar snap peas, which are already great on their own, is it doesn't take much to spruce them up if you're in the mood for doing a little more.

Here are a few quick ideas for what to do with snap peas. Note that before cooking snap peas (especially mature ones), you may want to "string" them (remove the membranous string running along the length of the pea by simply beginning at the tip and pulling it down).

-Saute with butter and sprinkle with sea salt
-Add to a stir fry
-Toss into a salad
-Add to any pasta dish

And for a light and refreshing meal for a sunny Spring afternoon, try this Quinoa and Sugar Snap Pea Salad.

Ingredients:

1/2 pound sugar snap peas
1 1/2 cups quinoa, rinsed and drained
1/4 cup plus 1 tablespoon extra-virgin olive oil
3 tablespoons white wine vinegar
Salt and freshly ground pepper
1/2 cup salted roasted pumpkin seeds
1/2 cup minced chives

Directions:

1. Simmer peas in a small pot of boiling, salted water until they are bright green and crisp-tender (about 1 minute). Spread them out on a large plate to cool, and pat try. Cut the peas on the diagonal into 1-inch pieces.

2. In a small saucepan, combine bring quinoa and 2 cups of water to a boil. Cover and cook over low heat until all of the water has evaporated and the quinoa is tender (about 15 minutes). Uncover and fluff the quinoa, then transfer to a large bowl and let cool to room temperature.

3. In a bowl, combine the oil and vinegar and season with salt and pepper. Add the peas to the quinoa with the pumpkin seeds, chives and dressing; stir. Season with salt and pepper and serve at room temperature or lightly chilled.

(recipe adapted from Food & Wine, http://www.foodandwine.com/recipes/quinoa-salad-with-sugar-snap-peas)

See you at the Produce Stand!

Wednesday, March 17, 2010

Produce Stand Closed this Friday!

Just a reminder: The Produce Stand will be going on hiatus this week.

We will be sure to let you know when we will resume business for Spring Quarter!

Best,
The Produce Stand Team

Thursday, March 11, 2010

Produce Stand THIS FRIDAY 11 am - 3 pm!

Join us this Friday from 11 am to 3 pm for the Stanford Produce Stand! Come get your weekly supply of delicious, fresh, organic, and locally grown items. We are located in the front courtyard of Tresidder Memorial Union.

From the Stanford Community Farm and gardens: Cabbage, lettuce, parsley, beets, turnips, collards, Red Russian and Dino kale, & peas

From ALBA Organics: Strawberries, tangerines, cauliflower


Spotlight on: Strawberries!


"Do you have strawberries?" Without fail, this question pops up at the produce stand every week. For the past quarter, the answer has been an apologetic "no." But this week, finally, the answer is YES! Strawberries are back at the stand, and to celebrate their arrival, here's an unconventional but delicious way to prepare them.

Strawberries with Balsamic Vinegar

Strawberries and balsamic vinegar is a combination that may seem odd or off-putting at first, but give it a try and you might be surprised. The balsamic vinegar softens the fruit and brings out its flavor (a process called maceration), resulting in a sweet, tart, addicting dessert.

Ingredients:
1 quart strawberries, hulled and cut in half

1/4 cup sugar (may substitute brown sugar for extra deliciousness)

1 teaspoon balsamic vinegar

optional: 1/8 teaspoon freshly ground black pepper for an extra kick
optional: fresh mint or basil leaves, for garnish Toss strawberries in a bowl with sugar and balsamic vinegar.

Let sit for 20 minutes at room temperature, and ta-da, you're done! If desired, add a twist of pepper or some chopped mint/basil leaves to garnish.


Try this Whipped Mascarpone Topping to serve with the berries:

Ingredients:

1/2 cup whipped mascarpone cheese

1/2 cup chilled whipping cream

1/2 teaspoon vanilla extract

2 tablespoons sugar

Whisk together all ingredients until thick soft peaks form. Can be covered and refrigerated up to 4 hours.


If you don't have any mascarpone on hand, these berries go just as well with vanilla ice cream, or a slice of pound or angel food cake.

So whether you plan on going home and whipping out the balsamic vinegar or simply snacking on berries on your way to class or the office, stop by the Produce Stand to get your strawberry fix.

See you at the Produce Stand!

photo credit: Epicurious.com (http://www.epicurious.com/recipes/food/photo/Balsamic-Strawberries-with-Whipped-Mascarpone-Cheese-105321)

Thursday, March 4, 2010

Produce Stand THIS FRIDAY 11 am - 3 pm!

Join us this Friday from 11 am to 3 pm for the Stanford Produce Stand! Come get your weekly supply of delicious, fresh, organic, and locally grown items. We are located in the front courtyard of Tresidder Memorial Union.

From the Stanford Community Farm and gardens: Cabbage, lettuce, parsley, beets, turnips, collards, Red Russian and Dino kale, & peas

From ALBA Organics: Red beets, kiwis, tangerines, & de ciccio broccoli


Spotlight on: Beets (again!)


For some reason, when I think of Jerry, I think of hummus. Jerry, in this case, is not the name of a person. It's the name of the 60-person house in which I live (affectionately named after the Grateful Dead frontman Jerry Garcia). Here at Jerry, we love our hummus. We eat our way through massive quantities of it every week (and have the piles of empty containers to prove it). It's the go-to snack for late night kitchen trips, and no house social event is complete until someone brings up the pita chips to go along with this ridiculously addicting chickpea dip.

I have, without a doubt, eaten more hummus in the past six months than I have in my entire life. Which is why, when I stumbled upon an utterly mesmerizing picture of beet hummus (above), I had no choice but to disregard the fact that I've already featured an article on beets and share this with you anyway.

First of all: Beet hummus. How did I not think of this combination before?! [Disclaimer!] Now, unlike the other recipes I've shared, I have yet to actually try this one out. This picture immediately caught my attention when I was browsing through food blogs, though. I couldn't stop staring at this strange-looking, brightly colored concoction. With the necessary ingredients (tahini sesame seed paste, lemon juice & zest, garlic, cumin, salt, pepper, and, of course, BEETS), the recipe couldn't be simpler. Just throw everything into a blender, pulse, and eat.

For the full recipe, visit this link at Simply Recipes. The one thing I noticed about this particular recipe was that it doesn't actually contain any chickpeas. I then found this recipe, which is essentially the same thing, but with one can of chickpeas blended in as well. I won't have a chance to make this this weekend, but I hope some of you do (and let us know how it is!!!) Luckily for you, we've got awesome bunched red beets at the Produce Stand this week, all ready to be blended into delicious, bright, hummus goodness.

See you at the Produce Stand!


Thursday, February 25, 2010

Produce Stand THIS FRIDAY 11 am - 3 pm!

Join us this Friday from 11 am to 3 pm for the Stanford Produce Stand! Come get your weekly supply of delicious, fresh, organic, and locally grown items. We are located in the front courtyard of Tresidder Memorial Union.

From the Stanford Community Farm and gardens: Cabbage, lettuce, parsley, beets, turnips, collards, and Red Russian and Dino kale, & peas

From ALBA Organics: Cauliflower, de ciccio broccoli, fuji apples, chioggia beets, & mandarins.


See you at the Produce Stand!

Thursday, February 18, 2010

Produce Stand THIS FRIDAY 11 am - 3 pm!

Join us this Friday from 11 am to 3 pm for the Stanford Produce Stand! Come get your weekly supply of delicious, fresh, organic, and locally grown items. We are located in the front courtyard of Tresidder Memorial Union.

From the Stanford Community Farm and gardens: Cabbage, lettuce, parsley, beets, turnips, collards, and Red Russian and Dino kale, & peas

From ALBA Organics: Cauliflower, de ciccio broccoli, fuji apples, chioggia beets, & minneola tangerines

Spotlight on: Cabbage!


As a child (and, admittedly, to this day), my favorite author was Roald Dahl. I have read Charlie and the Chocolate Factory more times than I can count. For those familiar with this book, you may remember the young protagonist, Charlie Bucket. Charlie lived in a small, poorly heated house with his parents and four grandparents. The Buckets were very, very poor and struggled to feed 7 mouths each day. According to the book:

"There wasn't even enough money to buy proper food for them all. The only meals they could afford were bread and margarine for breakfast, boiled potatoes and cabbage for lunch, and cabbage soup for supper."

As you can imagine, for many years I associated cabbage with a despondent, hungry Charlie Bucket. "Poor Charlie!" I would think to myself. "All he and his family have to eat is cabbage! How awful!" I'm not even sure I knew what cabbage was the first (twenty) time(s) I read the book. But it didn't matter, for Dahl's words succeeded magnificently in articulating all I needed to know: cabbage = not good. Cabbage, to me, was the complete antithesis of Willy Wonka's wondrous chocolate factory: bland and unappetizing.

How wrong I was! It's really too bad the Buckets did not have the cabbage recipe I am about to share with you. It comes from Molly Stevens' cookbook on braising*, All About Braising, The Art of Uncomplicated Cooking. In it, Stevens goes so far as to dub this dish the "World's Best Braised Green Cabbage." This assertion sparked such skepticism in me (how good could braised cabbage possibly be?) that I had to try the recipe out for myself. As a result, I learned that cabbage can, in fact, be flavorful and delicious enough to deserve the title of "World's Best Braised Green Cabbage." And you can, too! Here's how:

1. Preheat oven to 325 degrees Fahrenheit.
2. Oil a 9 x 13 baking dish.
3. Cut one head of cabbage into 8 wedges and lay in the baking dish.
4. Scatter a thickly sliced yellow onion and 1 large carrot (cut into 1/4 inch rounds) over the top.
5. Drizzle 1/4 cup olive oil and 1/4 cup chicken stock over the top.
6. Season with salt, pepper, and red pepper flakes.
7. Cover tightly with foil.
8. Bake 1 hour.
9. After 1 hour, remove the foil and flip the cabbage over. Re-cover, and bake for one additional hour.
10. When the cabbage is tender, remove the foil, increase the heat to 400 degrees Fahrenheit, and brown the vegetables for about another 15 minutes.
11. Sprinkle with sea salt and serve.

*Braising, for those unfamiliar with this cooking technique, is "a form of moist-heat cooking in which the item to be cooked is partially covered with liquid and then simmered slowly at a low temperature" (thanks, about.com!). I have always associated braising with meat (think: pot roast), but as I learned through this recipe, it's a method that serves veggies just as well.

Luckily for you, we have some beautiful cabbage available, harvested right from the Stanford Community Farm. Stop by the stand tomorrow and start braising!

See you at the Produce Stand!

(Picture source: http://bexar-tx.tamu.edu/HomeHort/F1Column/2007%20Articles/Plant%20of%20the%20Week/SEP1%20%27Cheers%27%20Cabbage.htm)

Thursday, February 11, 2010

Produce Stand this FRIDAY 11 am - 3 pm!

Join us this Friday from 11 am to 3 pm for the Stanford Produce Stand! Come get your weekly supply of delicious, fresh, organic, and locally grown items. We are located in the front courtyard of Tresidder Memorial Union.

From the Stanford Community Farm: Cabbage, lettuce, parsley, beets, turnips, collards, and Red Russian and Dino kale

From ALBA Organics: Beets, baby carrots, Minneola tangerines, Fuji apples, and de ciccio broccoli

Spotlight on: Kale!


Looking for an unconventional way to prepare the bountiful bunch of dino kale you picked up from the Produce Stand? Try roasting it to make kale chips! This method of preparing kale provides an excellent (and equally addicting) alternative to potato chips. Plus, it couldn't be simpler, requiring only three ingredients: kale, olive oil, and sea salt.

1.) Tear the kale leaves (not the stems) into chip-sized pieces (as big or small as you'd like).

2.) Drizzle about 1 tablespoon of olive oil per bunch over leaves, and season with sea salt and pepper to taste. Gently mix together.

3.) Lay the kale pieces in a single layer on a baking sheet (and if you're me, now would be an excellent time to sprinkle some Parmesan or Asiago cheese on top).

4.) Roast at 375 degrees for about 10-15 minutes, until edges are brown but not burnt.

5.) Enjoy!

Food for thought:
-Dino kale does, in fact, derive its name from its reptilian texture.
-One cup of kale packs in more than the daily requirement of vitamins K and A. Plus, it's an excellent source of calcium, fiber, and vitamin C.

See you at the Stand!

(picture source: http://www.seedsofchange.com)

Thursday, February 4, 2010

Produce Stand THIS FRIDAY 11 am - 3 pm

Join us this Friday from 11 am to 3 pm for the Stanford Produce Stand! Come get your weekly supply of delicious, fresh, organic, and locally grown items. We are located at Tresidder Union, in front of Jamba Juice.

From the Stanford Community Farm: Cabbage, lettuce, parsley, beets, turnips, collards, and Red Russian and Dino kale

From ALBA Organics: Fuji apples, blood oranges, French fingerlings, and broccoli

Spotlight on: Turnips!


If you've stopped by the stand these past 2 weeks, you may have tried one of our free turnip samples. Turnips are great eaten raw - crisp and refreshing. As delicious as this effortless snack is, however, sometimes people desire a little bit more from this underappreciated taproot. In these instances, I can think of no better way to jazz up a turnip (or any vegetable, really) than by dousing it in copious amounts of cream and cheese. Pick up some turnips (grown right here at the Stanford Community Farm!) and some fingerling potatoes to make this indulgent and satisfyingly delicious Turnip and Potato Gratin. If you're a turnip fan, this recipe won't disappoint; if you're not, this recipe just might change your mind.

Ingredients

1 garlic clove, peeled
6 turnips, peeled
2 large potatoes, peeled
2 teaspoons salt
1 1/2 cups heavy cream
3 ounces gruyere cheese

1. Heat the oven to 45o degrees. Rub the garlic clove all over he inside of a heavy gratin dish, ten butter the dish well and set aside. Discard the garlic.

2. Slice the turnips and potatoes as thinly as you can (a mandoline would come in handy here). Toss the vegetables with the salt and place them in rough layers in the gratin dish. Bake until softened, 20 to 30 minutes. Stir with a spatula every 10 minutes, making sure the bottom layer doesn't scorch.

3. Pour the cream over the potatoes; it should come just to the top layer without covering it. Distribute the cheese over the top and bake until the cream thickens and the top is browned, about 30 minutes. Serve hot.

*recipe from www.seriouseats.com*

Fun Turnip Fact: The Halloween tradition of carving a pumpkin originated with carving turnips! In the UK, turnips were carved on Halloween and left on doorsteps to ward off evil spirits. When the practice made its way to the US in the 19th century, turnips were replaced with pumpkins, which were more readily available.

"If there were only turnips and potatoes in the world, someone would complain that plants grow the wrong way." -Georg Chrisoph Lichtenberg

Monday, January 11, 2010

Video on Stanford Farm & Produce Stand


Special thanks to Leslie Mercado and Christina Carroll for making this video! If the video does not seem to be loading try clicking on the title of this post.

Tuesday, November 17, 2009

How to prepare winter squash


There are several varieties of winter squash, all of which are grown in the summer but can be stored throughout the winter. At the produce stand we've been selling butternut squash, grown on Stanford campus, and delicatta squash, supplied by ALBA organics.

Butternut squash is shaped like a vase with a large bulbous end and beige colored skin. It has a deep-orange flesh with a sweet, nutty flavor and tastes somewhat similar to sweet potatoes. Delicatta squash looks like a large ranging in 5-10 in length and is typically yellow in color with green stripes along its rind. It has a creamier flesh than most winter squash and tastes like a mixture of sweet corn and sweet potatoes.
(cited from whatscookingamerica.net)

Here are a few ways to prepare your winter squash:

1. Easy (steamed or boiled): Wash, peel, and remove seeds. Then cut squash into 2-inch cubes or quarter, leaving rind on (it will remove easily after cooking). Bring 1 inch of water to a boil in a saucepan and place squash on a rack or basket in the pan. Do not immerse it in water. Cover the pan tightly and steam the squash 30 to 40 minutes or until tender. You could alternatively places these 2-inch cubes in boiling water and cook for 30 minutes or until tender.

2. Easy (baked): Wash squash and cut it lengthwise. Cut squash in half and remove seeds. Place squash in a baking dish. Bake at 400°F for 1 hour or until tender. Seeds can be toasted at 350 degrees F for 20 minutes.

3.. Moderate (boiled, pureed): Sherried Winter Squash Bisque

Ingredients:
  • 2 tablespoons olive oil
  • 1 medium onion, chopped
  • 2-pound winter squash (preferably butternut or delicatta), peeled, cubed (about 6 cups)
  • 1 14 1/2-ounce can diced tomatoes, drained
  • 2 tablespoons dry Sherry
  • 2 1/2 cups (or more) canned vegetable broth

  • 2/3 cup nonfat half in half
  • 2 tablespoons chopped fresh thyme or 2 teaspoons dried

Heat olive oil in heavy large saucepan over medium-high heat. Add chopped onion and sauté until translucent, about 5 minutes. Add butternut squash and sauté until beginning to brown, about 10 minutes. Add tomatoes and Sherry. Boil until almost all liquid evaporates, about 30 seconds. Stir in 2 1/2 cups vegetable broth. Bring to boil. Reduce heat, cover and simmer until squash it very tender, stirring occasionally, about 30 minutes.

Puree soup in blender in batches until smooth. Return soup to same saucepan. Stir in half in half and chopped thyme. Bring to simmer. Season soup to taste with salt and pepper. (Can be prepared 1 day ahead. Cover tightly and refrigerate. Bring soup to simmer before serving, thinning with more broth, if desired.)

(adopted from sherried winter squash bisque recipe as seen on epicurious.com)

Thursday, November 12, 2009

This Friday (11/13/09) We're Selling...

From Stanford Community Farm and Gardens: peppers, eggplants, red beets, chioggia beets, red russian kale, dino kale, swiss chard, collard greens, bok choy, winter squash, cabbage, arugula, butterhead lettuce, and cilantro.


From ALBA organics: gala apples, mandarins, kiwis, fingerling potatoes, and broccoli


*All
ORGANIC and all LOCAL

Thank you for supporting the Stanford Community Farm and local farmers at ALBA organics by visiting our stand. And remember to check out our blog at http://stanford-producestand.blogspot.com/ for weekly availability, producetips, and recipe ideas.

See you there!

Nicole

How to prepare fingerling potatoes


Fingerling potatoes make delicious side dishes and have a richer, buttery texture than yukon gold potatoes. Here are two easy ways to serve your french fingerlings:

1. Easy (roasted): Pre-heat oven to 375 degrees. After washing potato skins roughly chop potatoes in halves or fourths, depending on their size. Place in a small roasting pan and drizzle with olive oil. Sprinkle rosemary, salt and pepper over potatoes. Roast in the oven for 30-40 minutes or until tender.

2. Moderate (boiled): Garlic Mash Potatoes

Ingredients:
fingerling potatoes
butter
garlic
heavy cream or half in half

After washing potatoes skins, fill a large saucepan with water and bring it to a boil on high heat. A single side serving uses about 2-3 small fingerlings. Place potatoes in water and boil for approximately 20 minutes or until tender. Once potatoes are tender all the way through strain them and cut potatoes in half. Place potatoes in a medium mixing bowl and with a potato masher, mash the potatoes (with skin for extra fiber) until they all reach a smooth consistency. A single serving of potatoes needs 1/2 tsp garlic, 1 Tb of butter and 2 Tb cream. In a small sauce pan melt butter. Sautee garlic for 1 minute and then add heavy cream or half in half.

Tuesday, November 10, 2009

More ways to prepare Beets!


Back in May we posted a few popular ways to prepare beets (raw, roasted, and boiled), which you can find by expanding the May posts in the blog archive.

We'd like to give you a three more options for preparing beets that we hope you'll enjoy.

1. Moderate (boiled and pureed): Borscht

Borscht is a type of soup that originates from Central and Eastern Europe that includes beets, cabbage, tomato, and onions.

Ingredients:
  • 3 tablespoons olive oil
  • 2 1/2 cups chopped green cabbage (about 1/4 of small head)
  • 1 large onion, chopped
  • 5 cups (or more) canned vegetable broth
  • 6 2-inch-diameter beets, peeled, chopped
  • 1 cup drained canned chopped tomatoes
  • 1 tablespoon fresh lemon juice
  • Low-fat sour cream
  • Chopped fresh parsley

Heat oil in heavy large pot over medium-high heat. Add cabbage and onion and sauté until cabbage softens, about 5 minutes. Add 5 cups broth, beets and tomatoes. Bring soup to boil. Reduce heat and simmer until vegetables are tender, about 30 minutes.

Puree 2-3 cups of soup in blender; return to remaining soup in pot. This will help thicken the soup while still leaving nice chunks of beets and tomatoes to savor. If desired, add more broth by 1/2 cupfuls to thin soup. Add lemon juice; season with salt and pepper.

Ladle soup into bowls. Top with dollop of sour cream; sprinkle with parsley.

(adopted from beet and cabbage borscht recipe as seen on epicurious.com)


2. Moderate-Difficult (boiled, grated): Beet Ravioli with Poppy Seed Butter

Ingredients:

Filling:

2 large red or golden beets or 4 medium beets (about 14 ounces)

  • 1/2 cup fresh whole-milk ricotta cheese
  • 2 tablespoons dried breadcrumbs
  • 2 teaspoons garam marsala


  • Fresh Egg Pasta:
  • 4 large eggs
  • 3 cups white flour
  • 1 teaspoon salt
  • 2 tablespoons olive oil (if using food processor)
  • water

Poppy Seed Butter:
  • 1/2 cup (1 stick) butter
  • 1 tablespoon poppy seeds
  • Freshly grated Parmesan cheese

To make pasta dough in a processor:
Blend flour, eggs, salt, and 2 tablespoons water in a food processor until mixture just begins to form a ball, adding more water, drop by drop, if dough is too dry (dough should be firm and not sticky). Process dough for 15 seconds more to knead it. Transfer to a floured surface and let stand, covered with an inverted bowl, 1 hour to let the gluten relax and make rolling easier.

To make pasta dough by hand:
Mound flour on a work surface, preferably wooden, and make a well in center. Add eggs, salt, and 2 tablespoons water to well. With a fork, gently beat eggs and water until combined. Gradually stir in enough flour to form a paste, pulling in flour closest to egg mixture and being careful not to make an opening in outer wall of well. Knead remaining flour into mixture with your hands to form a dough, adding more water drop by drop if dough is too dry (dough should be firm and not sticky). Knead dough until smooth and elastic, 8 to 10 minutes. Cover with an inverted bowl and let stand 1 hour to let the gluten relax and make rolling easier.

While pasta dough is resting:

Place beets in a large sauce pan and boil for approximately 20 minutes or until beets are very tender. Drain and cool. Peel beets; finely grate into medium bowl. Add ricotta cheese and season to taste with salt and pepper. Stir in breadcrumbs. Set aside.

Roll pasta with pasta maker:
Divide dough into 8 pieces, then flatten each piece into a rough rectangle and cover rectangles with an inverted large bowl. Set rollers of pasta machine on widest setting.

Lightly dust 1 rectangle with flour and feed through rollers. (Keep remaining rectangles under bowl.) Fold rectangle in half and feed it, folded end first, through rollers 7 or 8 more times, folding it in half each time and feeding folded end through. Dust with flour if necessary to prevent sticking. Turn dial to next (narrower) setting and feed dough through rollers without folding. Continue to feed dough through rollers once at each setting, without folding, until you reach narrowest setting. Dough will be a smooth sheet (about 36 inches long and 4 inches wide). Cut sheet crosswise in half. Lay sheets of dough on lightly floured baking sheets to dry until leathery but still pliable, about 15 minutes. (Alternatively, lightly dust pasta sheets with flour and hang over the backs of straight-backed chairs to dry.) Roll out remaining pieces of dough in same manner.

No Pasta Maker?

For ravioli you can roll the pasta dough with a rolling pin until the dough is approximately 1/8th to 1/4th inch thick. Start by dividing the dough into four pieces and work with each fourth individually.

Cutting Ravioli Rounds:

After you have thin pasta sheets, using 3-inch round biscuit cutter, cut sheet into rounds. Transfer rounds to lightly floured baking sheet; cover with plastic wrap. Repeat with remaining dough.

Stuffing Ravioli:

Place 8 pasta rounds on work surface, keeping remaining dough covered with plastic. Place small bowl of water next to work surface. Spoon 1 teaspoon beet filling onto half of each round. Dip fingertip into water and dampen edge of 1 round. Fold dough over filling, pushing out as much air as possible and pressing edges firmly to seal. Transfer to prepared towels. Repeat with remaining rounds. (Can be prepared 1 week ahead. Transfer to rimmed baking sheet and place in freezer until frozen solid, about 6 hours. Transfer ravioli to resealable plastic bags).

Cooking Ravioli:

Melt butter in large skillet over medium heat and stir in poppy seeds; keep warm. Working in batches, cook ravioli in large pot of boiling salted water until cooked through, stirring often, about 2 minutes. Using slotted spoon, transfer to skillet with melted butter; toss to coat. Divide ravioli among 8 plates; sprinkle with Parmesan.

(adopted from beet ravioli with poppy seed butter recipe as seen on epicurious.com)


3. Moderate (boiled and baked): Chocolate Beet Bundt Cake

Trust me. This cake is worth trying.

Ingredients:
  • 1/2 cup (120 ml) canola oil
  • 1 1/2 cups (340 g) packed dark brown sugar
  • 2 cups (450 g) puréed cooked (boiled or steamed) red beets (about 3 medium-size beets)
  • 1/2 cup (90 g) nondairy semisweet chocolate chips, melted
  • 1 teaspoon (5 ml) vanilla extract
  • 2 cups (250 g) all-purpose flour
  • 2 teaspoons (9 g) baking powder (look for aluminum-free)
  • 1/4 teaspoon salt
  • Confectioners' sugar, for dusting

Preheat oven to 375°F (190°C, or gas mark 5), and lightly oil a Bundt pan.

In a mixing bowl, cream together oil and brown sugar. Add beets, melted chocolate chips, and vanilla, and mix well.

In a separate bowl, combine flour, baking powder, and salt. Add to wet beet mixture, and stir until just combined.

Pour into prepared Bundt pan, and bake for 45 minutes, or until a toothpick inserted near the center comes out clean.

Cool in pan for 10 minutes before removing to a wire rack. Cool completely. Before serving, dust with confectioners' sugar and top with blueberries, if desired.

If you want frosting you could also reserve 1/4 cup (55 g) of the puréed beets (or purée a fourth beet) to create a red/pink frosting or ganache, using confectioners' sugar and nondairy butter such as Earth Balance. For a ganache, use the water in which you cooked the beets to thin out the topping. For frosting, fluff up using a hand mixer.

(adopted from chocolate beet bundt cake recipe as seen on epicurious.com)